Description

Asked me once Brother in "Chocolate". Suggested to try the cake called OPERA. Delicious, hearty... I Decided to restore this masterpiece at home, fortunately, there is a reason. First, where I went, it's our favorite website. Cake here this is, but, no offense to the author, I did not understand. Decided to poke around on the Internet and I found this: options cake a lot, probably due to the fact that the authorship fought two of the greatest confectionery house. I chose the house of Gaston Le nôtre, who (Gaston Le nôtre), by the way, was the prototype of chef in the cartoon Ratatouille. Why am I still attracted to this option... As I understand it, the author and the site itself has translated this recipe from the book by the famous Gaston Le nôtre, which (book) was produced only in French, English and Japanese. But when making this, don't be afraid of the word Masterpiece, I did not neglect to take advantage of advice and other masters. And here I suggest your Opera (L'opera Cake) on your court. By the way, in cooking it was not so difficult as its description. The cake can be cooked in one evening. The words cite the author with his corrections and additions in brackets.
Ingredients
-
Butter
45 g
-
Chicken egg
6 piece
-
Egg white
6 piece
-
Sugar
30 g
-
Flour almond
225 g
-
Powdered sugar
225 g
-
Flour
70 g
-
Yolk egg
1 piece
-
Vanilla
0.5 tsp
-
Butter
200 g
-
Chicken egg
1 piece
-
Sugar
100 g
-
Water
90 g
-
Instant coffee
10 g
-
Dark chocolate
240 g
-
Milk
125 g
-
Cream
60 g
-
Butter
60 g
-
Cocoa powder
65 g
-
Gelatin
10 g
-
Sugar
180 g
-
Water
180 g
-
Cream
120 g
-
Water
125 g
-
Instant coffee
7 g
-
Sugar
65 g
Cooking
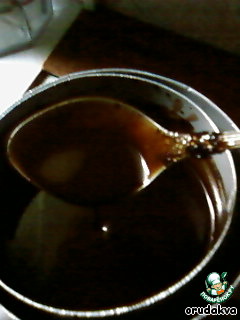
So, let's start. The cake consists of 3 thin layers of sponge cake La joconde soaked in coffee syrup, butter coffee cream, ganache, dark chocolate 70% chocolate mirror glaze. The cake has to finish a chocolate inscription "Opera" and decorate with sprinklings of edible gold, which I tried to replace gold dust to give the feeling of an old worn out theatrical gold. Work becomes much easier and the process goes faster when distributed in advance what is coming. First, it makes sense to make the impregnation, coffee cream and ganache. To set them aside. Coffee syrup: in a small saucepan, combine water, sugar and coffee powder. Bring to a boil. Remove from heat and allow syrup to cool. You can pour it into a small container, close tightly and put in the fridge for up to a week. Or just cook all natural, ground coffee, strain through a strainer and mix with sugar. (I've removed overnight in the refrigerator).

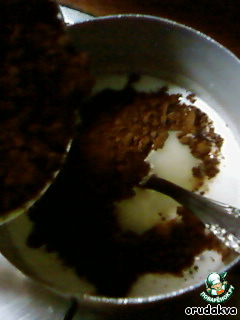
Coffee buttercream: in a small bowl, combine coffee powder and boiling water (30 ml). Stir until dissolved. Set aside.

In a mixer bowl, pour in the egg and egg yolk. Beat at high speed incandescent and frothy state.
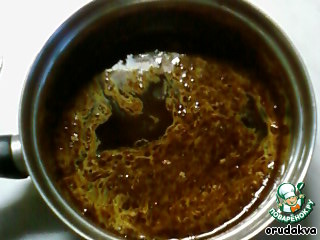
In a small saucepan, combine the sugar and water, heat over high heat to dissolve sugar, heat until then, until you reach a boil. Stirring occasionally, cook on medium heat until the mixture is heated to 124°C till the stage of thick caramel (I was about 8-10 minutes). Immediately, without any delay, otherwise the caramel is in a moment hardened (well there was a husband, he helped me heat and pour the remnants of caramel, very well, dries fast!), pour this caramel into the egg mixture while continuing to whisk on a strong speed (due to the lack of my husband and 3 and 4 hands missing photos)
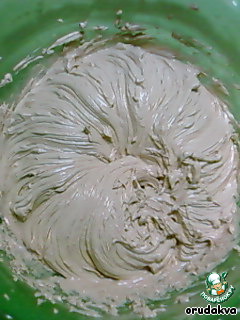
After a minute, switch the mixer mode to medium speed and beat so another 5 minutes, until the mixture becomes thick, silk and reaches room temperature.

Mash butter with a fork. It should be very soft.
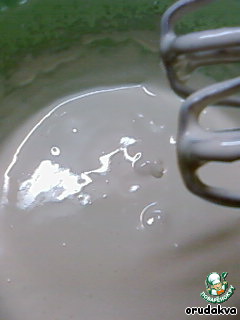
In the egg and caramel mixture, pour in the vanilla extract (my vanilla), coffee syrup and oil in stages. All this time, continuing to mix on medium speed. At first the cream will exfoliate (like curdled milk).
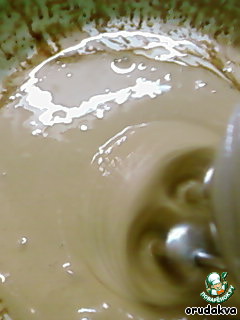
Then switch the mode of the mixer to high speed and whip the buttercream until then, until it becomes more dense satin. Cream on eyes will be transformed and sealed.
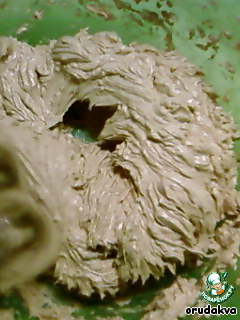
Put the cream into a container or bowl. Cover with clingfilm and store in the refrigerator until it is sufficiently compacted to hold the shape. I don't really need, because the cream was very thick and strong. You can also freeze it in an airtight container for up to a month or keep in the refrigerator for a week, but he will before use at room temperature, and again whisk it on high speed until it regains its satiny texture. (I kept the day in the fridge, and then churned with a mixer somewhere 7-10 minutes).
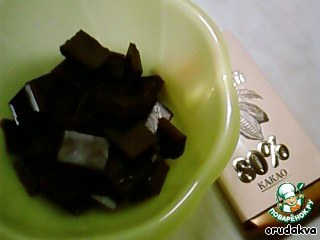
Ganache: put the chocolate in a bowl.
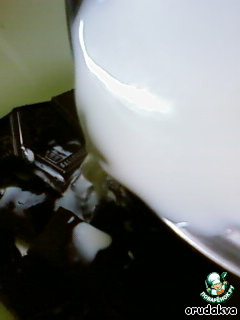
Over medium heat bring milk and cream to a boil, then pour it into the chocolate. Wait 30 seconds until it melts, then gently stir in a circle (one side only) with a spatula, until a homogeneous mass. Be careful not to create air bubbles. Let the chocolate has cooled slightly, somewhere up to 60°C.

Then add the butter and stir with a spatula until a homogeneous mass. Don't worry if the mixture looks very liquid at this point. (And again, I help her husband, prevented for a long time, but such a delicious ganache I even did!).
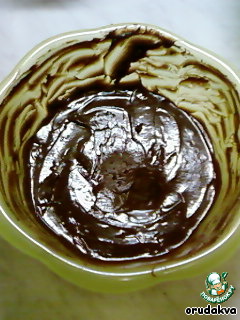
Cover with a lid or cover with clingfilm and store in the refrigerator until it thickens. (Mine was thick at once). You can freeze or store in the fridge as the buttercream, but if you freeze it for a day before using, refrigerate, then stir until smooth.
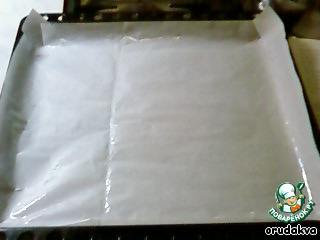
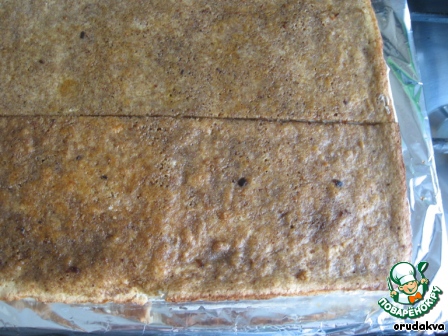
Biscuit "Mona Lisa": preheat the oven to 220°C. Prepare 2 rectangular baking pan. Cover them with parchment paper and lightly brush with oil. Biscuit needs to go on a baking sheet in a thin layer, because the whole idea of cake in a very low altitude, but it needs to be wide and long. If, for comparison, it needs to look like our wafer cake "Fad", but enlarged.
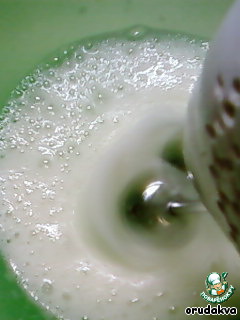
Whip the egg whites on low speed in a clean bowl until foamy state,...
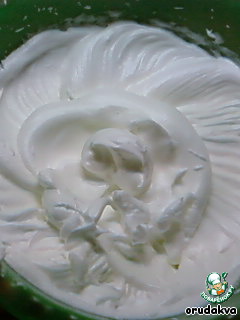
... then switch to medium-high speed until the whites are soft peaks. Switch to high speed, gradually adding sugar. Continue whisking until the whites will not take the form of a white, smooth and stiff peaks.
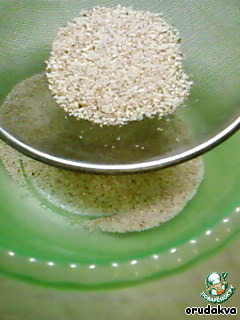
(Almonds I crushed in a blender and sieved through a sieve if you do so, the consumption of nuts somewhere 200-250 gr)
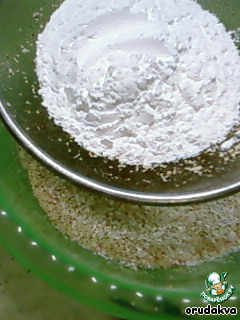
(In a bowl with almond flour sift the flour and icing sugar)
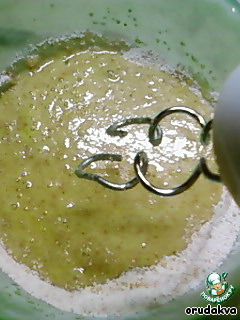
In another bowl, using nozzle hook, whisk almond flour mixed with wheat, icing sugar and eggs on medium speed for 3 minutes until smooth.
Gently add egg whites into the batter with a rubber spatula.
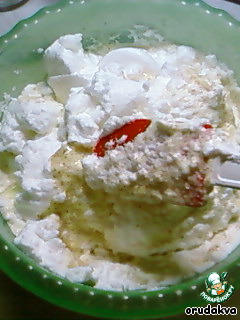
In the bowl with the dough pour in the melted butter, stir with a rubber spatula just to combine.

Divide the dough into two parts and apply evenly on the baking sheets. (Here I made a mistake! :- ( I had the pan on which I baked the cake one by one, cut it according to the recipe etc My baking tray took at the high temperatures and the dough is merged on one side, it is better to take a little shape and bake 3 cake) Bake cake 5 to 7 minutes or until browned. If the layers you have turned out thicker than necessary, then bake for 10 minutes. (Do not hold longer, I was waiting for a strong Browning and the cookie monster first burnt slightly) Let them cool for 15 minutes and flip them onto the prepared surface, remove the parchment. Allow to cool completely.
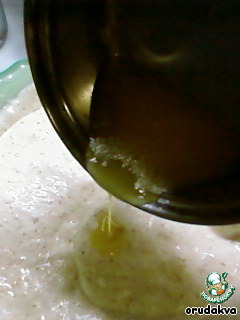
Assembly: Cut the sponge cake so that you will have the 3 rectangular formation. Ie from 2 rectangular biscuits should measure a specific part to cut off and folded subsequently, we received 3 equal in length and width of the layer of biscuit. (In my example – every sponge cake I came up with a length of 33 cm, we add 33+33=66 cm – total length of the biscuit. Now divide by 3 – it turns out that each part of the cake should be about 22 cm On this piece and need to cut two whole biscuits and the remaining segments (11 cm) to connect. Don't worry if you can't quite exactly a cake at the end podmanivaya. Put the first, a sponge layer on prepared pan. (The bottom rectangle I turned porous side down. Melted 40g chocolate with a brush smeared the surface of the cake and put it in the refrigerator until firm. So the impregnation will not result.)
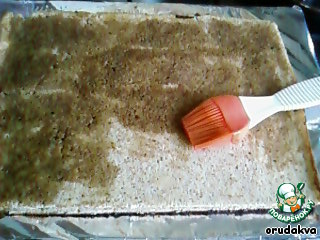
Evenly, using a brush, apply the coffee syrup. Should take about 3 tbsp each (if the cakes turned thick, feel free to do the other half of the syrup).
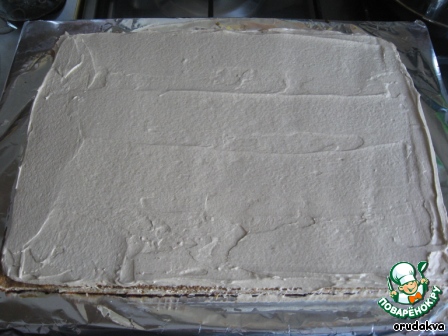
Spread on top of coffee cream, spread evenly with a spatula. Everything should be very smooth.
Carefully place on top of two cut sheet "Mona Lisa", which together will have a length basis, closely combining the joints. Repeat the process with syrup.
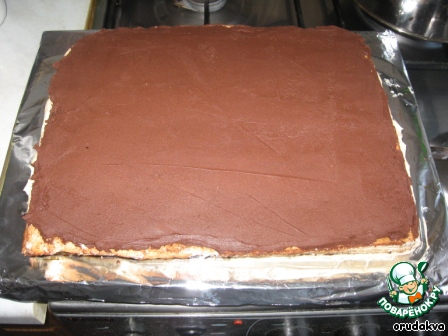
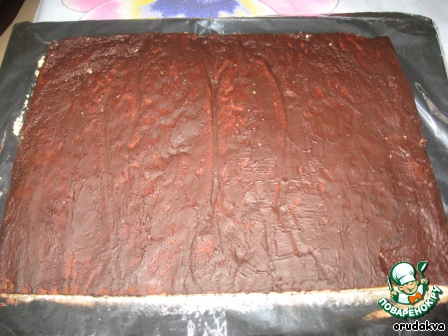
Across the surface to apply the ganache. Then on the third biscuit and apply the syrup and refrigerate for 30 minutes. Then with a spatula, trying to do so that the surface was perfectly smooth, without a single bogorotsky, apply on top of the cake remaining cream. Refrigerate for 1 hour or in the freezer for 30 minutes (photo somewhere...)
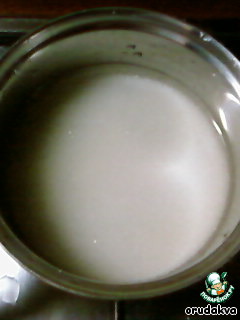
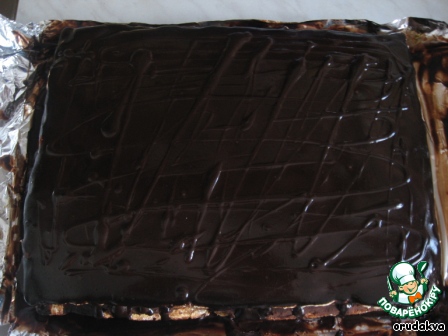
Glaze: In a small saucepan with a thick bottom pour the cream, 150g water, sugar and mix very well. Bring to a boil over high heat. Sprinkle in cocoa and mix well with a whisk. Remove from heat. Very slowly stir to remove all the air. Do it by using a teaspoon dip it in the center, chocolate glaze, slowly begin to interfere, gradually increasing circles, and then slowly lifting the spoon from the surface (I interfere with cocoa with a spoon, so apparently bubbles almost was not) Cool the frosting to 43°C – this will take a long time, be patient.
Pour gelatin 30 g water, wait until then, until it has absorbed all the water and will not swell. (The original was 6 g of gelatin, but somewhere I read that this is not enough, so added 10 g) Place the chocolate coating in a water bath and dissolve gelatin in it. He had to leave. Then let the mixture cool to 24°C. This is very important – if you apply too warm the icing, it will melt the cream and the entire surface of the cake will be in an ugly divorce.

When the glaze has cooled sufficiently, strain it through a fine sieve onto the surface of the cake, nothing is helping spread the chocolate mass, while the whole upper part will not be covered. (Here's where I started Comedy: I did this last night, aides were all asleep. Beginning immediately pour the frosting... In the end table, the door table, floor and my hands were in icing! So pour the icing parts, a thin layer quickly gelled. And in the end I even managed to make it a little design.) Leave in the fridge overnight.
It's the next morning.
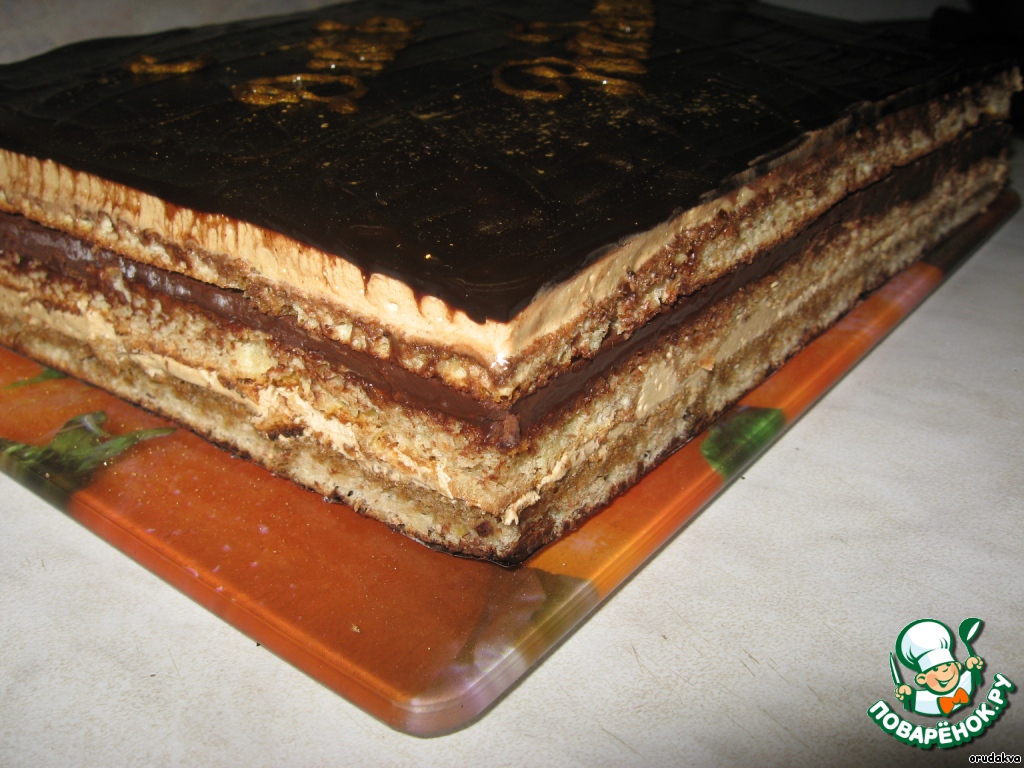
In the morning take a long, sharp knife. Dip it in boiling water for a minute that it is well heated. Then cut the cake to become very flat rectangle. (I, as the daughter of a beekeeper, decided to do as a dad in the processing of frames with honey: poured a deep pot of water, dropped into it with a big knife, the water is boiling, take out the knife, wipe and cut. The knife was still not big enough, so small stains glaze). It is better to use a ruler. Before each new cut the next side, wash and dry the knife so the cuts were clean, not smeared with cream or ganache. Let it cool again.
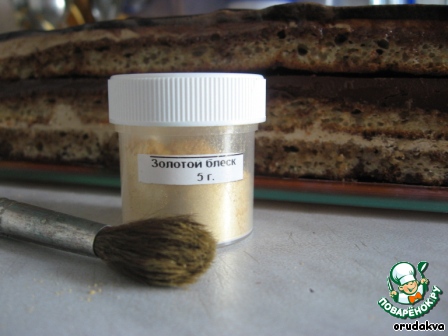
I decided not to depart from the classic cake decorations. To write OPERA, I did not, but made a centerpiece of gold.

And there's my Opera.
Serve: cut cake into square pieces and served chilled.

Leave a comment or a recipe review
Leave comments can only registered users.
Register, or Login if you are already registered.