Description
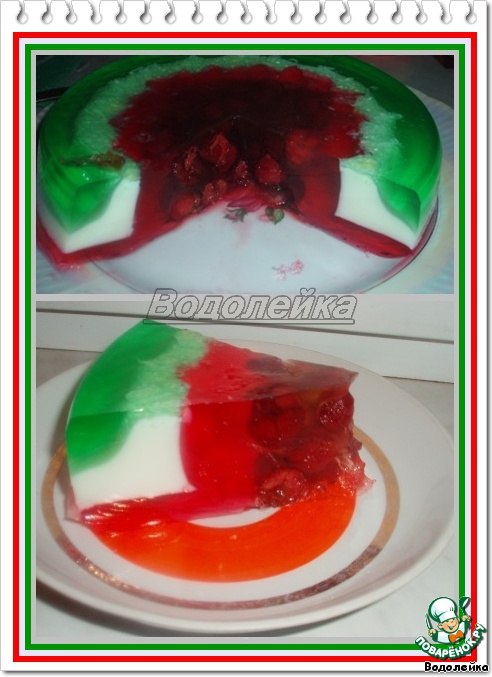
I want to offer you alternative DESIGN jelly cake. I think not, I'm sure guests will be delighted with this jelly. Saw this beauty in the photo album on Picasa. However, the magazine was in a foreign language (if not wrong, then in Spanish), but the pictures everything is clear and understandable. By this I could not pass. Of course, I got not so beautiful as in the photo, but ..... I'm not a magician, and just learning. This is my first fantasy. No, of course, jelly layers and tilted I was doing, but for the first time. Please do not judge strictly.
Ingredients
-
Jelly
-
Milk
-
Sugar
-
Water
-
Gelatin
-
Fruit
-
Vanilla sugar
Cooking
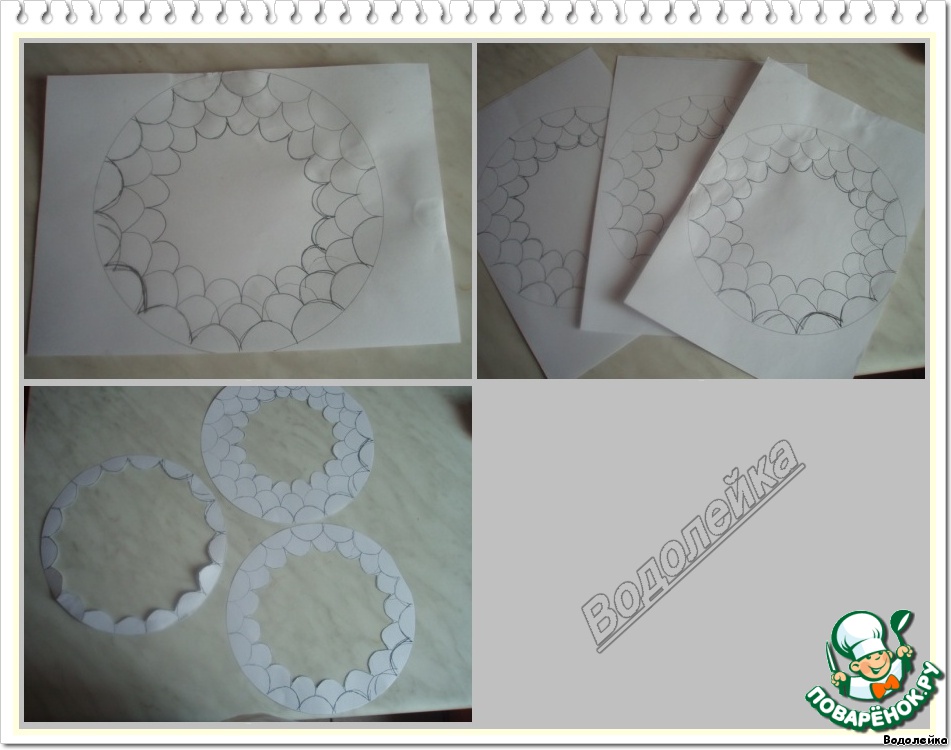
So there you go. The first thing you need to do the stencil. The diameter of the circle = the diameter of the mold (I had a detachable 22cm). After, in a circle start to draw here are "scallops" (as in my photo). They need to draw three rows. When you're ready, make photocopies (we need three things). And, cut out the stencil, one on the first "scallops", and the second on the second row of "scallops" and third last row of "scallops". In principle, the photo shows what happens.
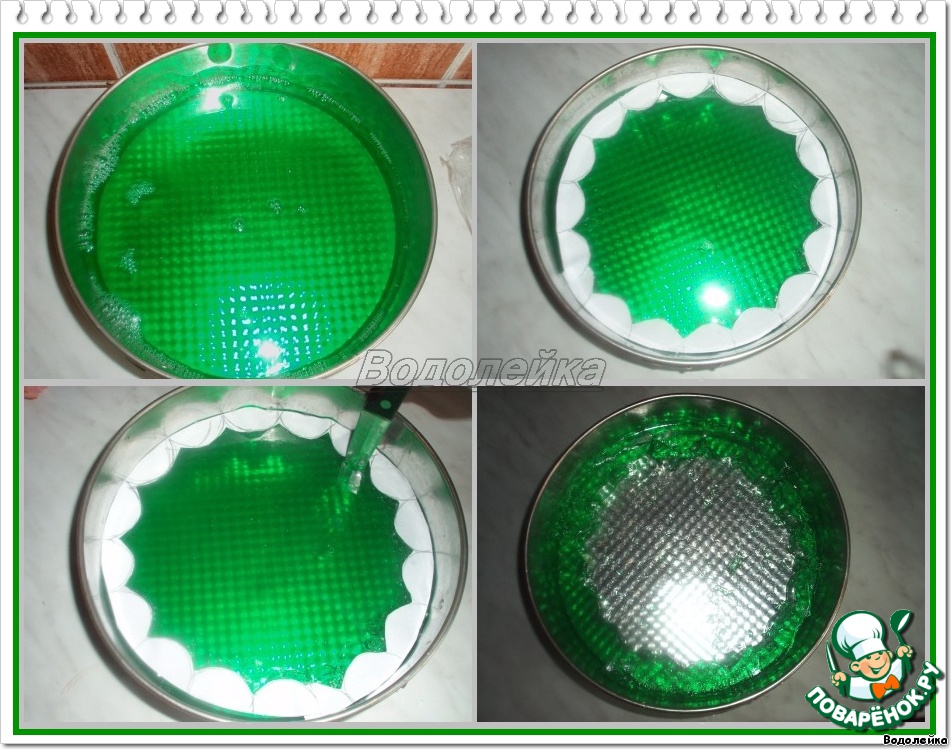
Then take a pack of jellies (their number depends on the diameter of the mold, I had 3 packs green. Prepare jelly according to instructions on the package....BUT!!!!! of water to take less than what is listed. I took not for 400ml and 250ml pack of (respectively, of water I took 3пачки 750ml). Jelly cool, pour into the mold and let it harden. When WELL cured, get. Take our template with one row of "scallops", put on top of the jelly, take the knife (the knife must be sharp and thin), wetted it in the water and start to cut according to our pattern. After the midway neatly off to the side (you can just eat). We have one small notched rim and a large hole.
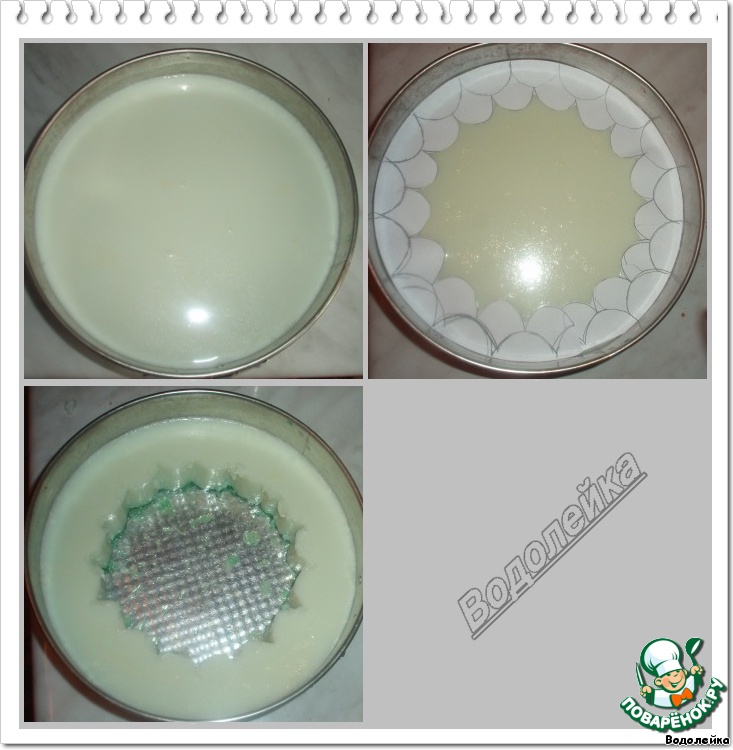
Now prepare a jelly from milk (I did it when the first coat is solidified in the fridge). Milk (1 liter) with sugar and vanilla sugar (sugar to taste, and vanilla sugar I had 1пачка) bring to a boil to melt the sugar, allow to cool + the softened gelatine (I used 30g). Pour the finished milk jelly in the same form and put to harden in the fridge. When WELL hardens, take out. Now take the template with two rows of "festoons" and done the same thing (ie, cut a template, as in the previous step). The middle remove again (it is also possible to eat). Here, we have the second layer, and the hole in the middle became less.
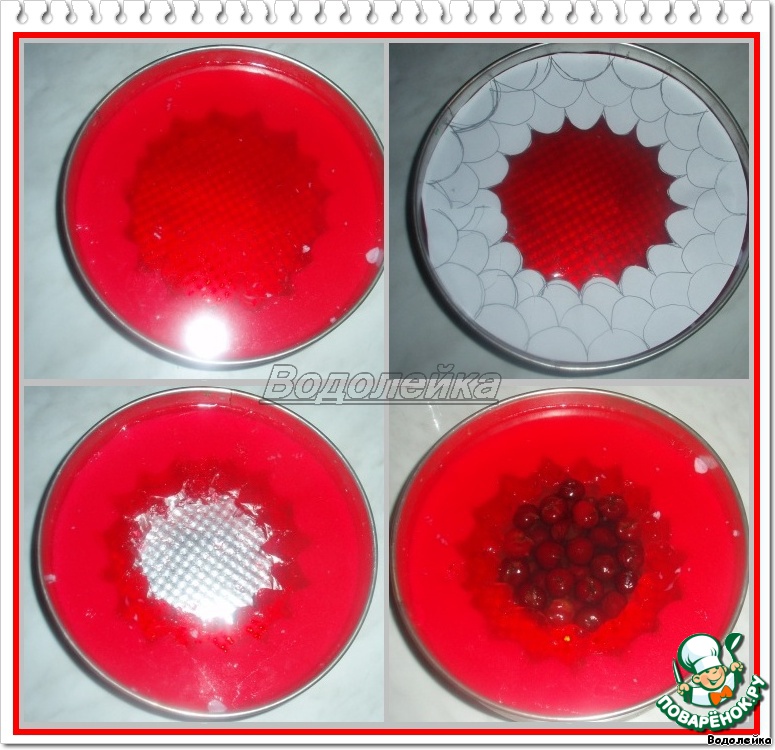
Do the same thing with the red jelly. Only red jello I had 5 packs and, accordingly, water 1250мл. To cut here take pattern with three rows of "scallops". Cut out the middle, too, can eat. Now our "hole" put any fruit or berries (I have cherry). Here I made a small mistake (more on that below). And pour on top of transparent jelly (which can be cooked while frozen red layer) from water, sugar, vanilla sugar and gelatin. Filled and put in the fridge.
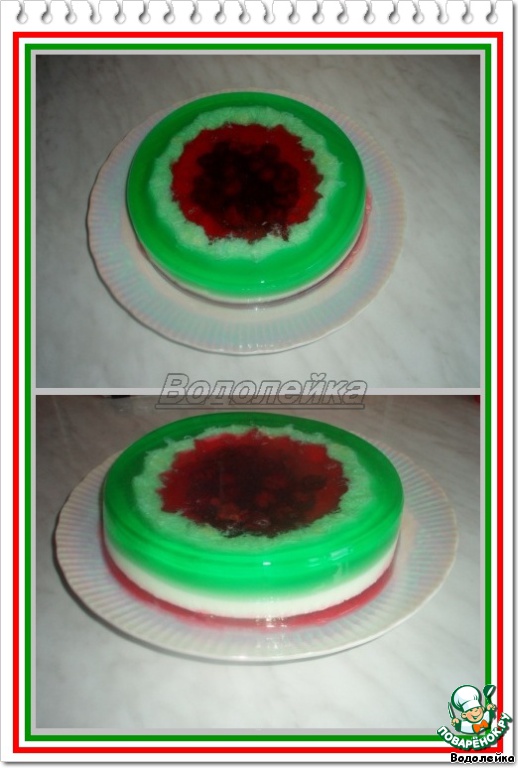
Before submitting the form with jelly to lower for some seconds in hot water and GENTLY turn on the dish. That's such a fantasy came to me.

But, the fantasy in the section.
Leave a comment or a recipe review
Leave comments can only registered users.
Register, or Login if you are already registered.