Description

Dietary and vegetarian options. Ossetian national cuisine. Delicious, healthy and easy to prepare pie, will always delight You and Your family a unique combination of ingredients and flavor.
Ingredients
-
Flour
4 cup
-
Milk
500 ml
-
Water
500 ml
-
Yeast
30 g
-
Chicken egg
1 piece
-
Tops
-
Greens
-
Adyghe cheese
-
Vegetable oil
0.5 cup
-
Melted butter
-
Sugar
1 tsp
-
Salt
-
Sour cream
1 Tbsp
Cooking
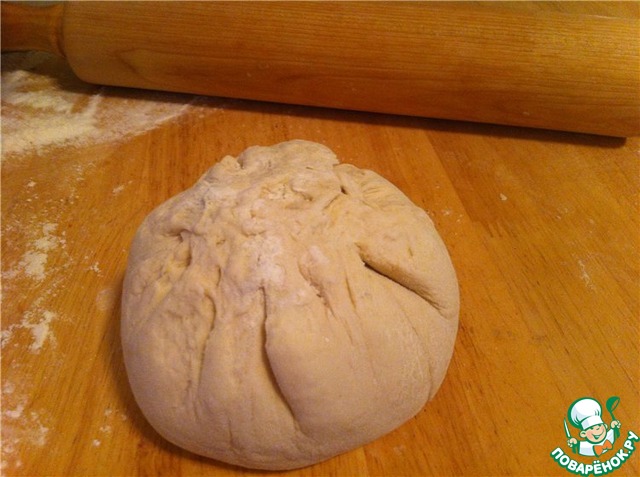
This pie - spring-summer, in the old days it was prepared, when in the garden don't only beet tops and green and everything that can be put in the filling. If (as an option) add the spinach, it turns out divinely delicious. But let us remember that the basis of the filling of this pie - beet tops. Now is the best time to bake these pies, spring is coming, and with it the deficiency. We will back up yourself with vitamins! P. S. the Number of products listed for about 5 pies, with a diameter of about 30 cm so, the dough. The recipe for this dough in my recipe book, the first. Again repeat that for any of the Ossetian pies, you can also use unleavened dough on kefir (the photo shows it). But most still pie tops cooked on a yeast dough, so I will give its recipe here. Dissolve the yeast in warm water with sugar, prepare the sourdough. Water should not be too cold or too hot, otherwise the dough won't be able to come. The temperature should be pleasant for hand warmth. A little warmer than body temperature, 40 degrees, maybe 45, but no more. After 10 minutes add the fact that we have: kefir, whey, milk, water or a mixture of these products, so that the whole amounted to about 500 ml. During the fast, prepare the dough in ordinary water, and do not bother. It turns out very well. In a large, deep bowl sieve the flour heap (and preferably twice to saturate with oxygen, not lazy), immediately sprinkle with salt, top to make a recess, pour in the yeast mixture. Gently begin to knead in a circle inside the deepening, gradually interfering with the flour from the sides. Egg can be added if desired (I personally don't add). Knead elastic dough semi-liquid (such to stick in your hands, thicker than for pancakes). Do not score the dough with flour! Put the dough in a large pot. The bottom of the pan pre-greased liberally with vegetable oil, roll the dough into the oil and leave. Cover the pot with a towel and put in warm place for about an hour and a half to raise. The time depends on the quality of flour and yeast should look. In the room with the test in any case should not be draft. After some time looking, if approached slightly egged, cover again and leave for another. Then we divide the dough into portions, each of which is about the size of a fist (this is the future pie). Sprinkle each piece with flour, cover and leave for proofing, for 15-20 minutes. Of course, the taste of cakes depends on the quality of flour and all ingredients. The fresher and better they are, the cakes are softer and tastier.
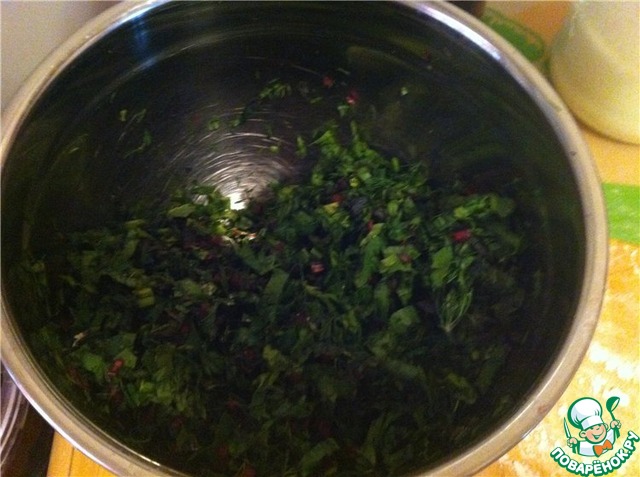
Go through the beet leaves, rinse in cold running water, shake off, lay on a towel, be sure to dried. Cut the stems, leaving only the leaves themselves. If you want to leave part of the stems, then, in principle, possible, but they should be very thin and finely chop. Cut sheets as thin as possible strips. Add available in the garden or in the refrigerator greens. Fit and fennel, and spinach, and green onions, green and everything that Your heart desires. Well, of course, without fanaticism.
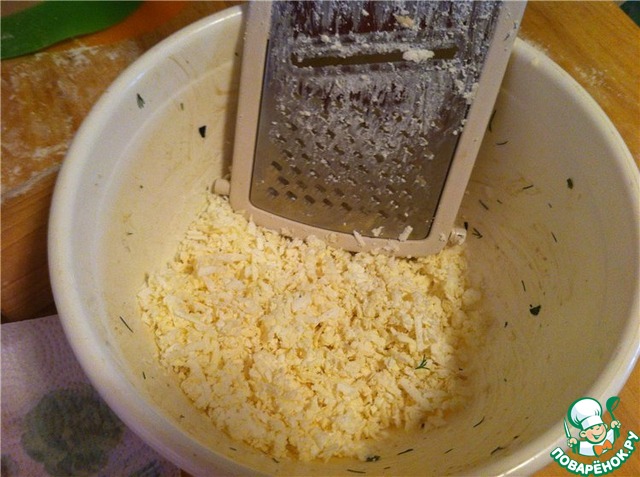
In a separate bowl, grate on a coarse grater fresh Ossetian cheese (ideally). If no Ossetian, Adyghe it is possible, at the worst, chicken or cheese, or a mixture of these cheeses. Most importantly, the cheese should not be boiled. Only rennet (brine) cheese, preferably very fresh. If it is too salty, the grass does not doselevel. If unsalted, you can salt the filling, but only at the very end, before sculpting the cake, otherwise the filling will allocate juice, leak and tear the dough.
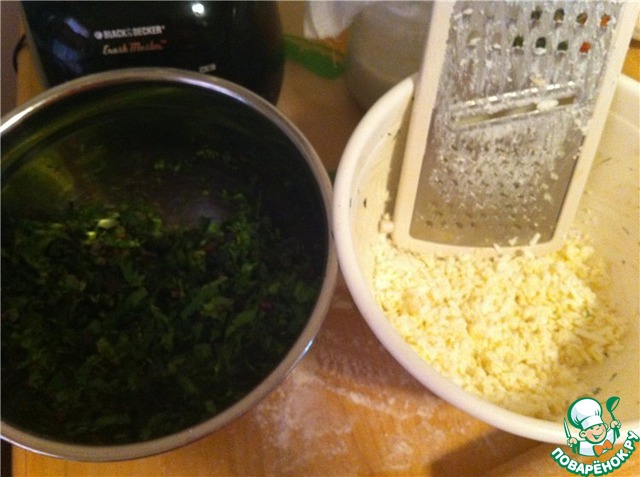
So, cut greens and foliage, rubbed cheese.
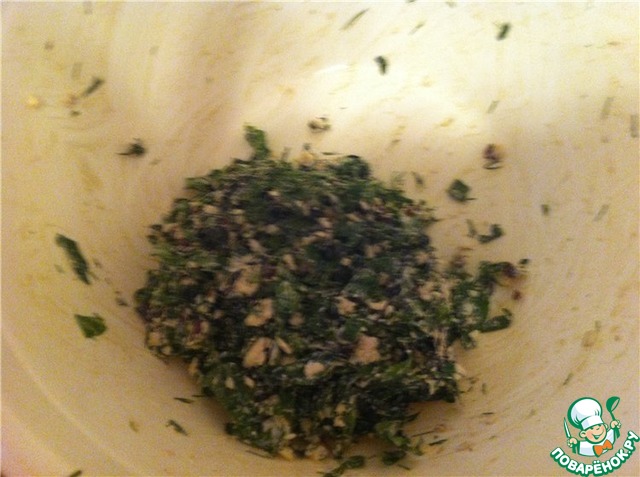
Connect. Add 1-2 tbsp of sour cream. If necessary, add salt (taste for flavor). Then the filling can be rolled in a ball, but not too tight. Proportion: two large pencil topper - about 500 gr. cheese (this should be enough for three to five pies). ATTENTION: DO NOT FORGET TO PREHEAT THE OVEN TO 220-240 DEGREES. THE OVEN SHOULD BE VERY HOT!
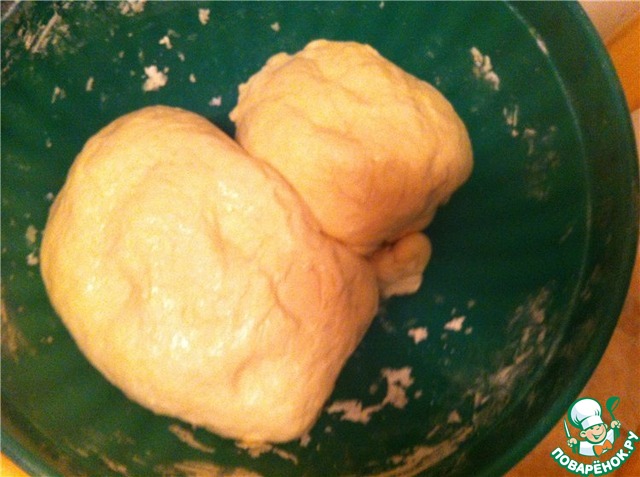
Give the pieces of dough forms balls. If it sticks, the hands can be lubricated with vegetable oil. The dough should be soft and elastic. The filling also roll into balls according to the number of pies, so convenient. The filling in the pie should be at least 60%. That is, the test should be smaller, and the toppings more. An experienced seamstress could put the toppings even more. But first at least try 60% to 40%. They need to practice. The dough and filling, of course, should be in different bowls. Here I have on photo dough is not yet divided into equal pieces, let this not discourage you. Alas, no photo yet.
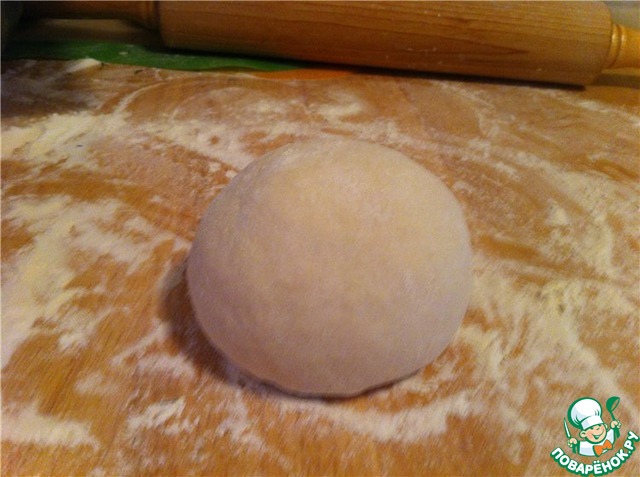
While working with the first bun, the rest should be covered with a towel, not a little dried out. Take one portion of dough. Lightly sprinkle the table with flour so that the dough does not stick. Also sprinkle flour on the work surface. Oil now can't use. If the modeling dough sticks - sprinkle with flour it lightly, but not too much that pie in the end was not hard.
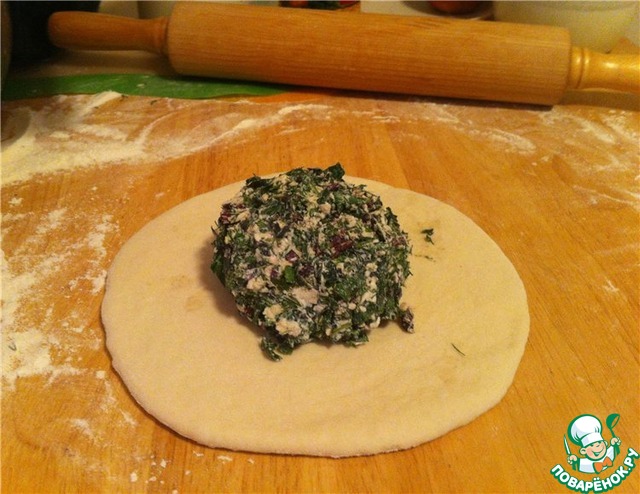
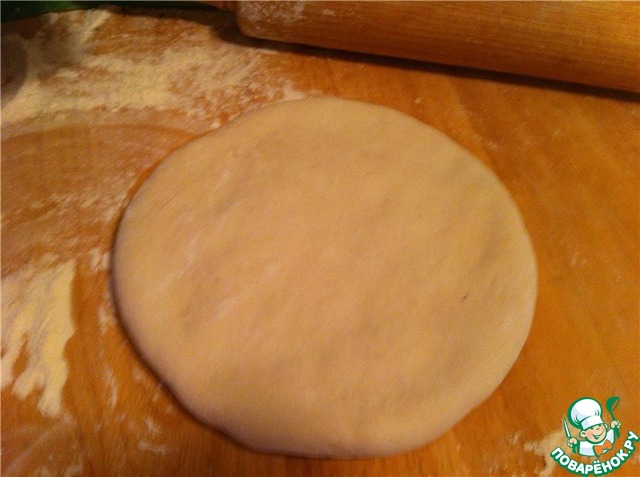
From gingerbread make a pancake (you can roll it with a rolling pin) with a thickness of about 0.7 cm). Take one of the prepared parts of the filling, roll a ball and put on the pancake. If the stuffing turned out watery, it can be slightly overcome in order to get rid of excess juice, otherwise there is a risk that the cake will break, especially when cooking for the first time.
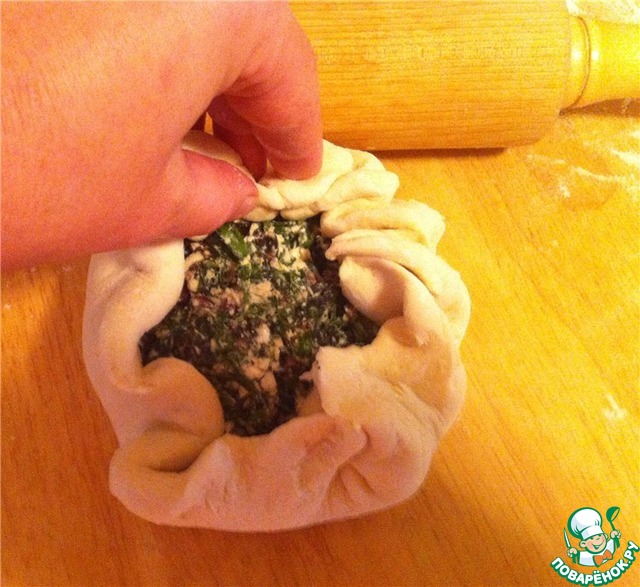
Carefully collected from the edges to the middle, moving uniformly in a circle
It turns out that's a big "dumpling", or rather "Hinkali" round shape: PS Place of the clutch fasten very well to adjourn. Check. Sprinkle the joint with flour.
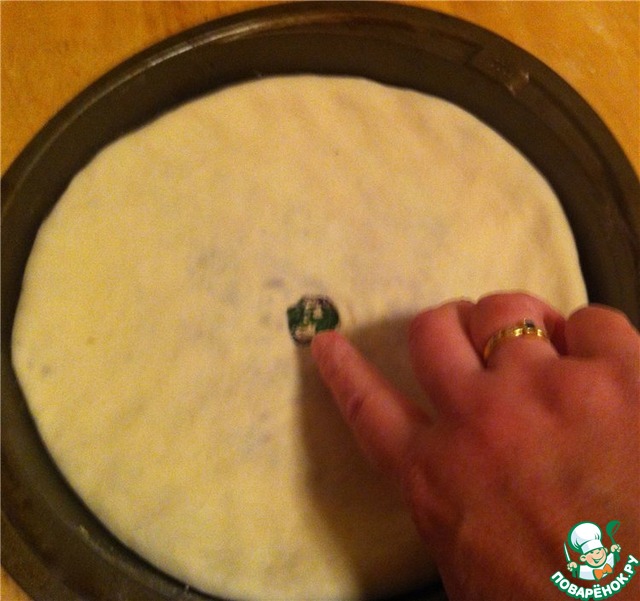
Make a "dumpling" flat - respective evenly and carefully so the dough is not paralasis (you can gently roll out), give it a smooth round shape. Quickly turn the cake "ugly" side, that is, seam side down, and put on a greased baking sheet. It must be done very quickly. Again to split the pie from the middle to the edges of the pan, trying to distribute the filling evenly inside. Flat palm slightly crush the dough, walking in a circle around the pie, from the middle to the edges. This is done so that the dough top and bottom was thin and the filling is evenly distributed. Masters with experience flip the cake from one side to the other, and tuck 2-3 times. But at a time one at a time on each side, our main task - not to allow the cake to crack, especially at the bottom.
In the center of the pie to make your finger a small hole below it in the oven is not swollen and not "exploded". In any case, do not pierce the cake thoroughly! Hole only be done in the upper layer of the test! And again I repeat: that pie looks good, need to put it in the pan plastered down so that the whole, "beautiful" piece of the pie was on top (close up "dumpling" as it should, that during baking the cake and spread to the filling not emerged, and sprinkle the place with flour. And at the top "flat" part of the inverted pie had to make a hole.
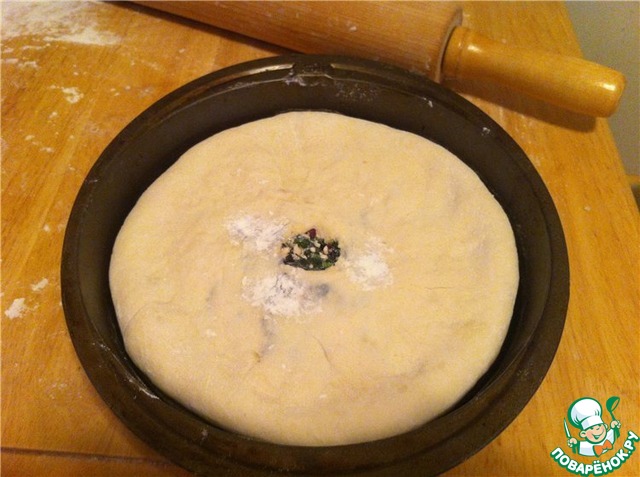
It looks like this:
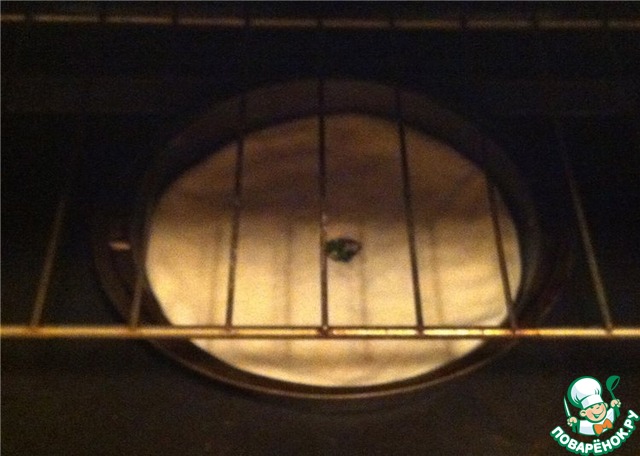
Send the pie on the bottom shelf of the oven, carefully pre-heated to 220 to 240 degrees or more. The oven should be VERY hot! Pies are baked quickly. After 7 minutes check the cake to get the pan up and chat to him here and there... if the pie behind the bottom, so it is possible to move it higher in the middle of the oven, to brown. If not behind to hold on to even a little below.

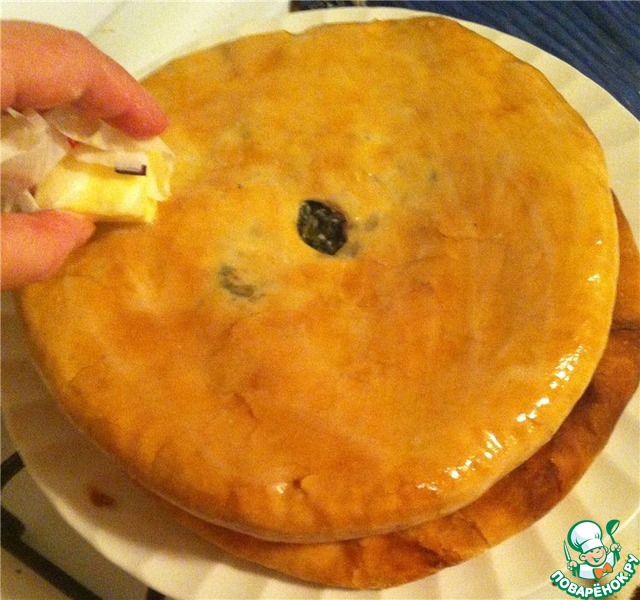
After shifted the pie on the middle level of the oven, bake for another 15 minutes (see color.) Will not overdo it should not be too dark! Once flushed - you can take it. The longer you keep the cake in the oven, so it becomes tougher. Carefully take out the cake from the pan and put on a flat plate (or on a special wooden circle). If the finished cake is left too much flour, shake off a dish towel or napkin. Then quite liberally lubricate the top of the cake (or the bottom, neat) butter, and even better melted. Oil regret not necessary, the more the better (if You are on a diet, of course). Vegetable grease is impossible, because pies from it stale, lose their color and taste. Cover with cellophane and cellophane on top of a dish towel, or anything else warm, to make another pie. Thus the pie to cool and become softer.
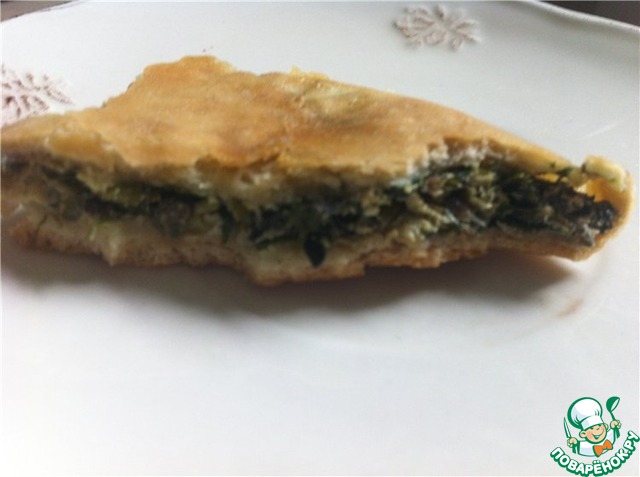
Finished cakes put on top of each other the pile like pancakes. Cut like a pizza into 8 parts. Crosswise, then again crosswise on the diagonal. PS Riding skill counts if the dough is thin, and the toppings a lot (like a duvet cover and a blanket).
Cheese pies, pumpkin, potato/cheese, etc. is performed in exactly the same way. Read more about other fillings in the next post. Bon appetit!
Leave a comment or a recipe review
Leave comments can only registered users.
Register, or Login if you are already registered.